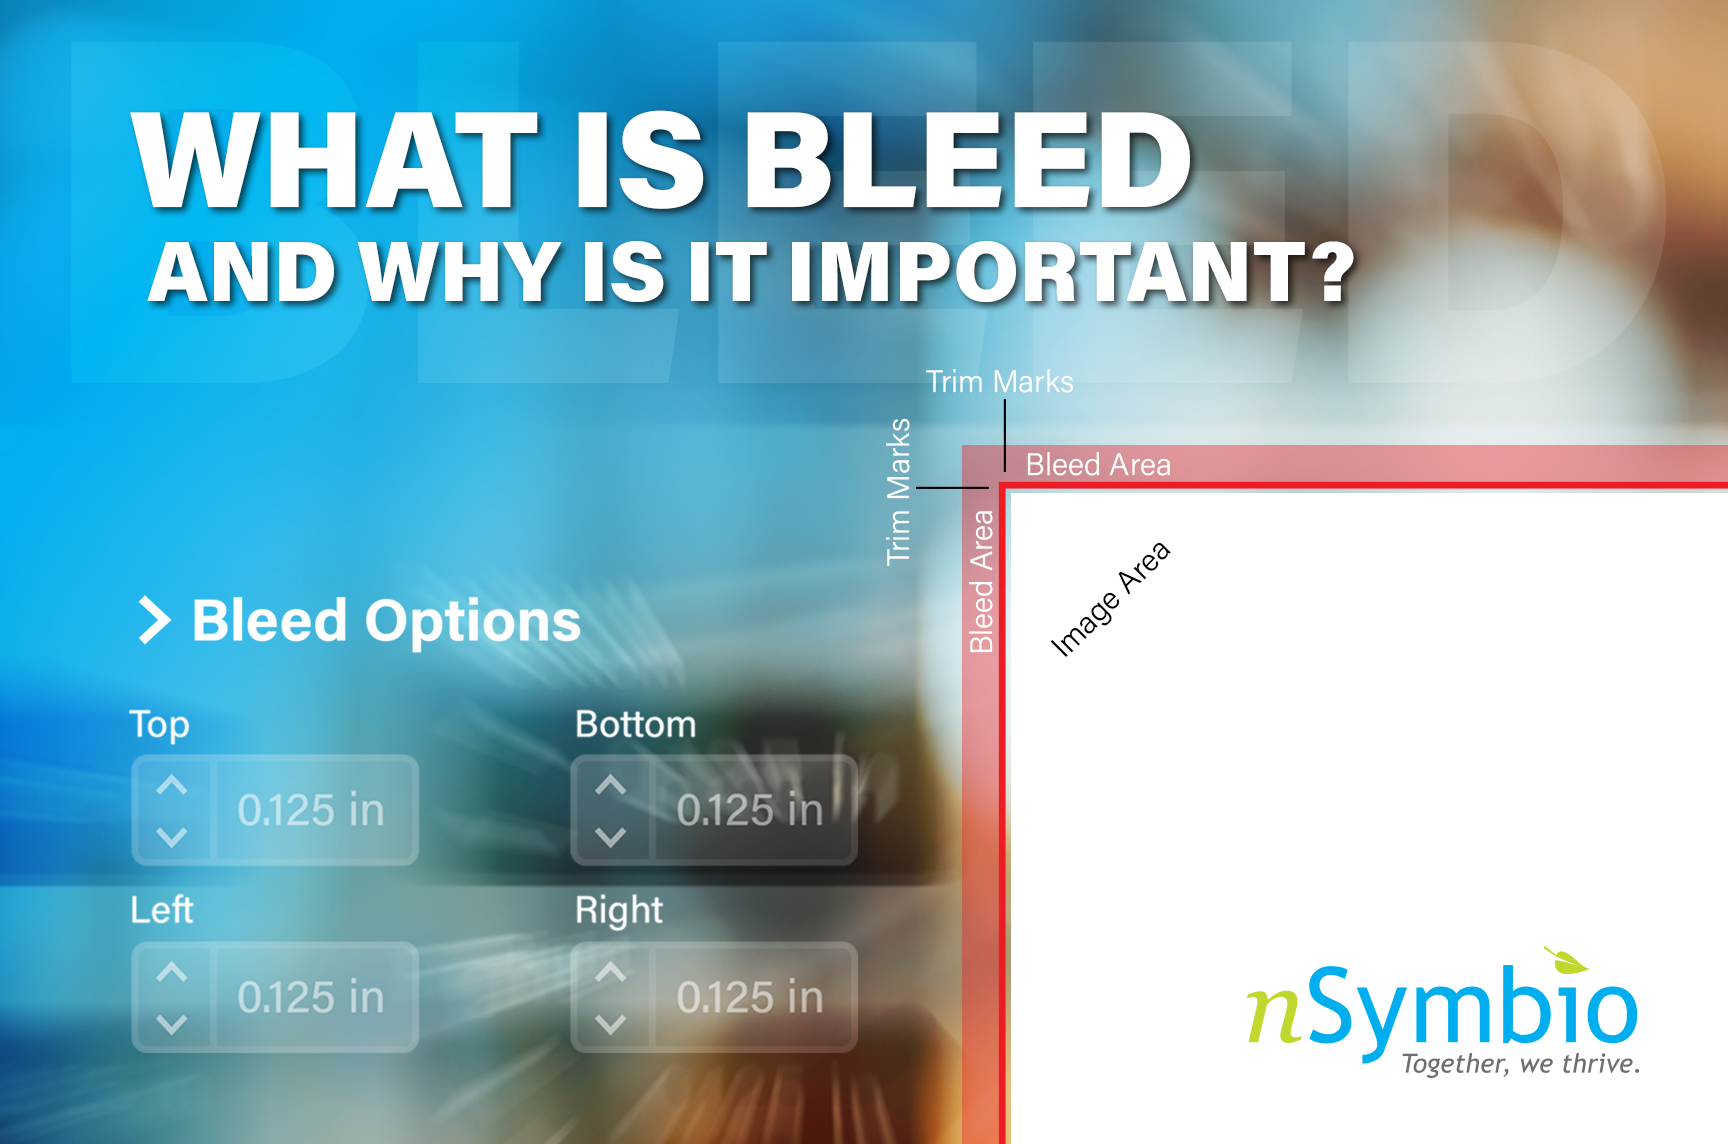
What Is Bleed And Why Is It Important?
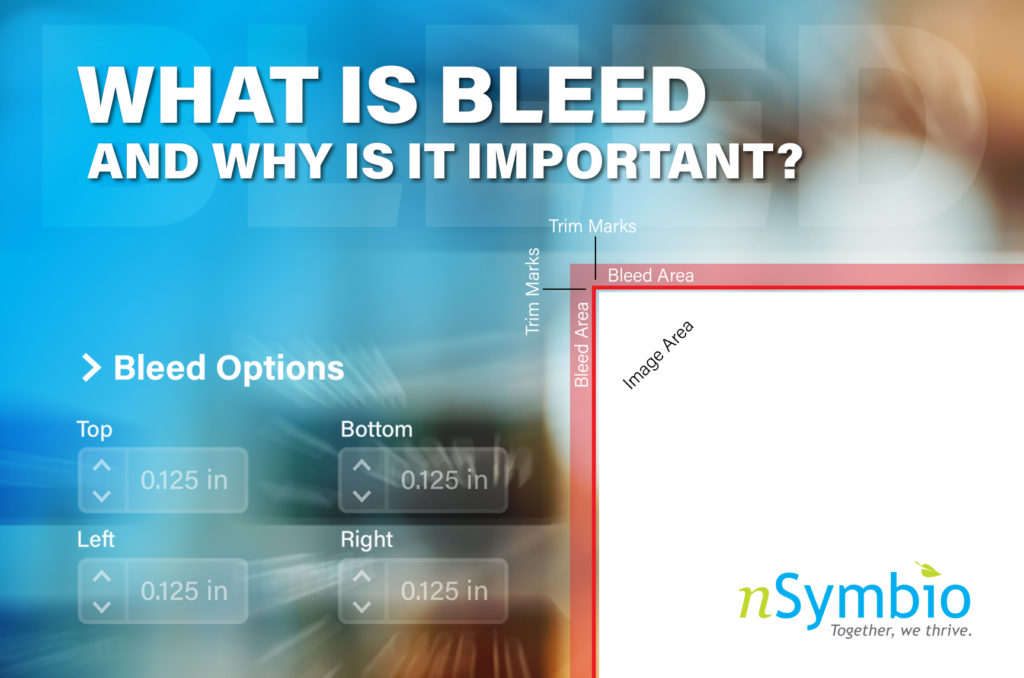
The printing term “Bleed” is the printable area that goes beyond the edge of your design where the sheet will be trimmed giving the illusion of edge-to-edge printing (no margins). In other words, the bleed is the continuation of color, an image, or a graphic that extends past the confines of your design’s artboard which allows us, your printer, to account for movement of the paper during production.
What’s the Appropriate Bleed Size?
A standard bleed area (in the U.S.) is typically 1/8 of an inch (0.125”) on each side (top, bottom, left, and right). So, for example, if you’re preparing a standard letter sized document (8.5” x 11”), to include bleed, you would need to set your bleed settings to add 0.125” to the top, 0.125” to the bottom, 0.125” to the left, and 0.125” to the right side of the design, creating a larger document area totaling 8.75” x 11.25”. Depending on the type of project, we may require a larger bleed area, so before you start that design, it’s always a good idea to give us a shout to ensure you have the correct specs.
How do I add Bleed to my InDesign Document?
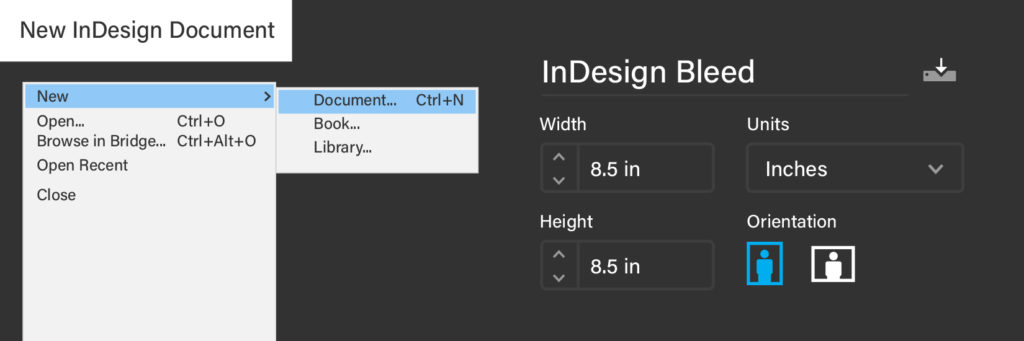
When creating a new document, set your width, height, and unit (in this case I’ll be using inches).
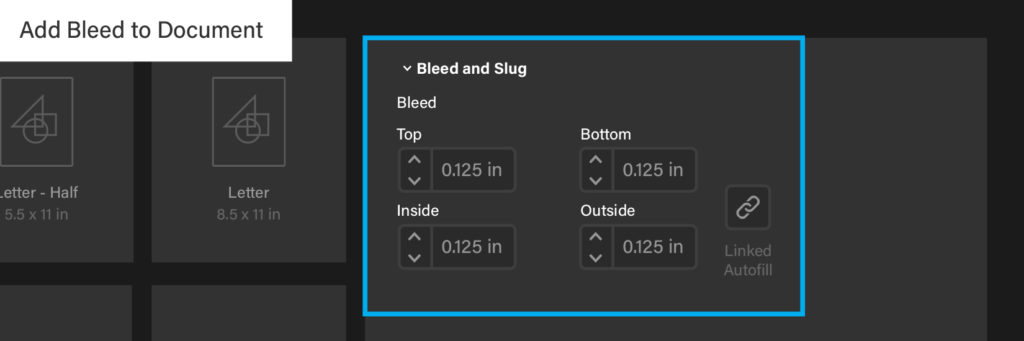
Before clicking “Create”, scroll down a little bit and click “Bleed and Slug”to expand the panel options. From here, you’ll want to enter the amount of bleed to add you your document. Again, in this case, I’ll be adding 1/8 of an inch or 0.125” to all parameters (top, bottom, inside, and outside) or you can simply set one of the values and click the “chain” icon to auto fill the remaining fields.
Can I Add or Change the Bleed Settings to an existing InDesign Document?
You can always add a bleed area to your document later, or edit bleed settings you previously entered. Choose File > Document Setup. Click “Bleed and Slug” to expand it, enter or update your values, and then click “OK”.
How do I Add Bleed to my Illustrator Document?
Launch Illustrator and select File > New (Ctrl + N) to access the new document interface. Enter your document width, height, and unit of measurement (in this case, I’ll be using inches).
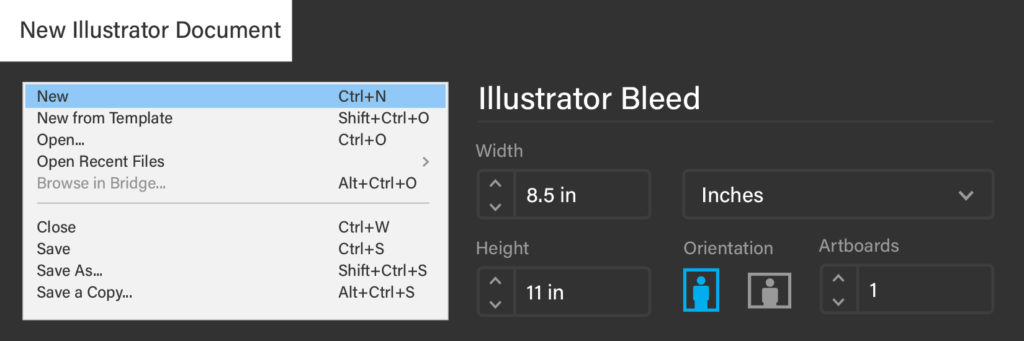
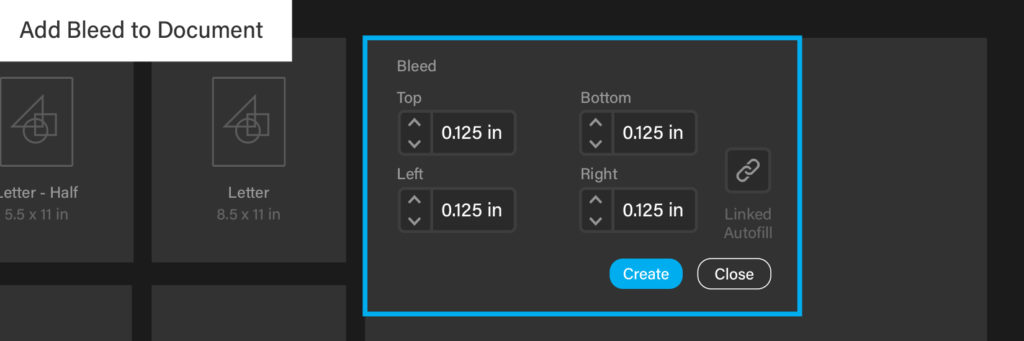
Underneath your basic document settings you’ll see the different bleed fields (top, bottom, left, and right) which I will add an 1/8 of an inch bleed (0.125”) to all fields and click “Create”.
Add or update your Illustrator bleed settings
You can always add a bleed area to your document later, or edit bleed settings you previously entered by Choosing File > Document Setup. Update accordingly and click “OK”.
How do I Add Bleed to my Photoshop File?
Technically, there is no bleed setting in Photoshop. You would simply create your document size to include the bleed. So for example, if your document is 8.5″ x 11″, you would create / design your photoshop document size to include the bleed (0.125″ Top, Bottom, Left, and Right) for a final size of 8.75″ x 11.25″ and then import to your desired application (i.e. InDesign or Illustrator). However, here’s a quick work around to create both bleed and crops (trim marks) within photoshop in a pinch.
Create a New Photoshop Document:
Begin by creating a new Photoshop document (File > New) and set the final size, resolution, and color mode. In this case, I’ll setup a letter sized document (8.5” x 11”) at 300 dpi as a CMYK file (for Print).

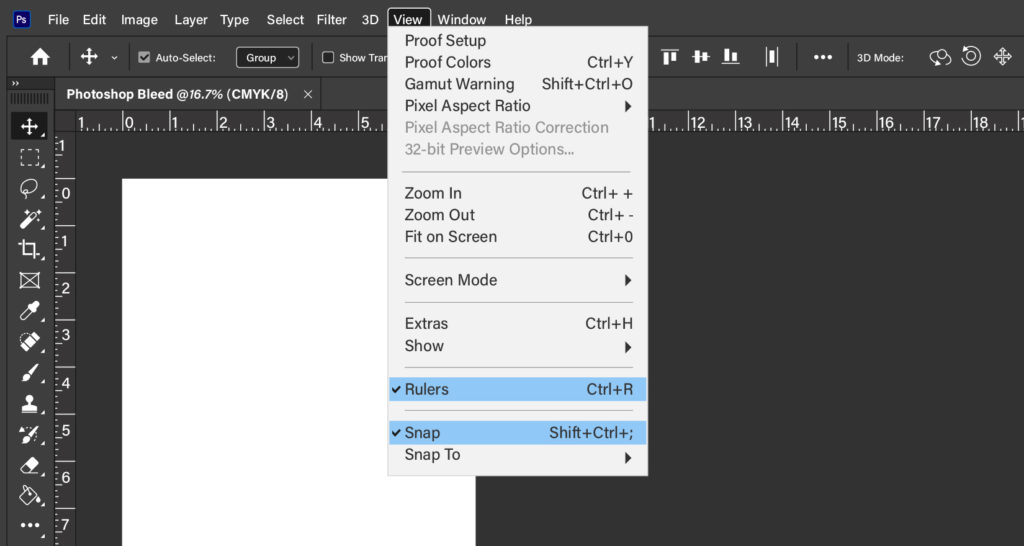
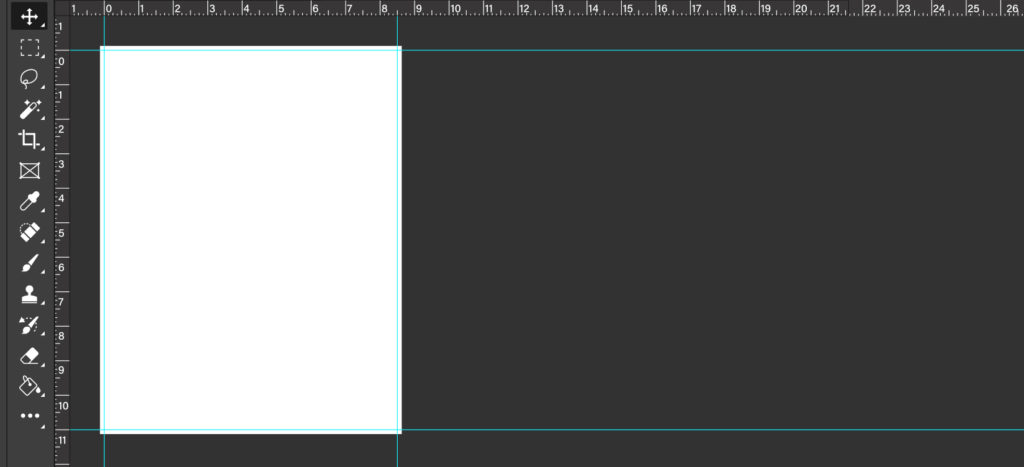
Make sure that rulers are displayed by choosing View > Rulers, and also make sure that snapping is enabled by choosing View > Snap.
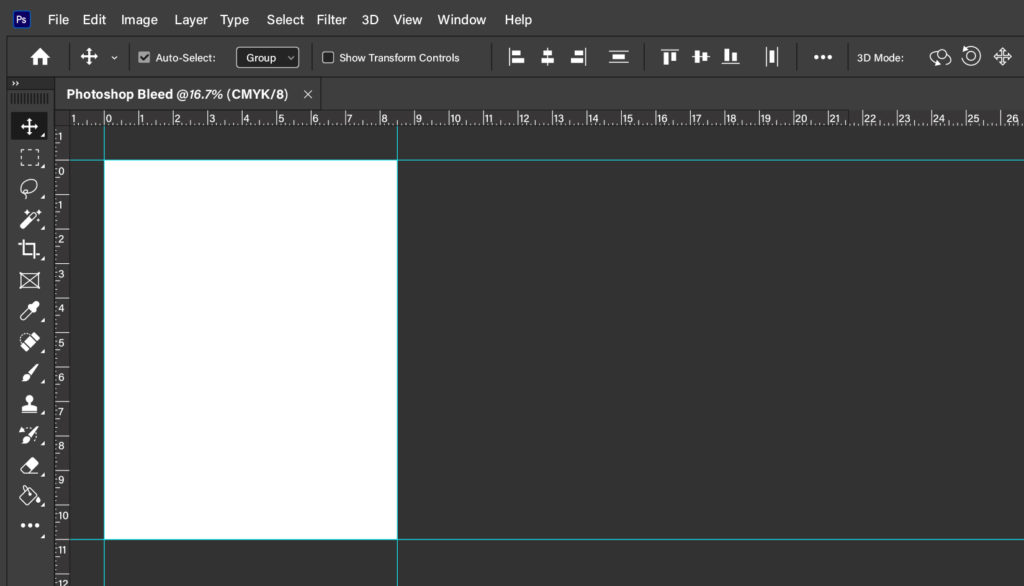
Click on the ruler and drag a guide to each edge of the document (top, bottom, left, and right). The guide should snap to the edge of the document automatically as seen below:
Create Space for the Bleed
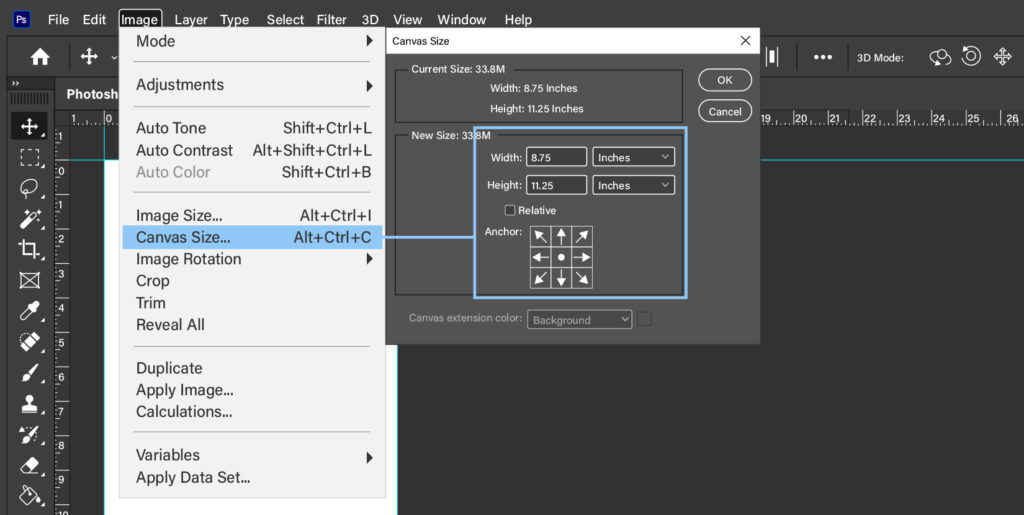
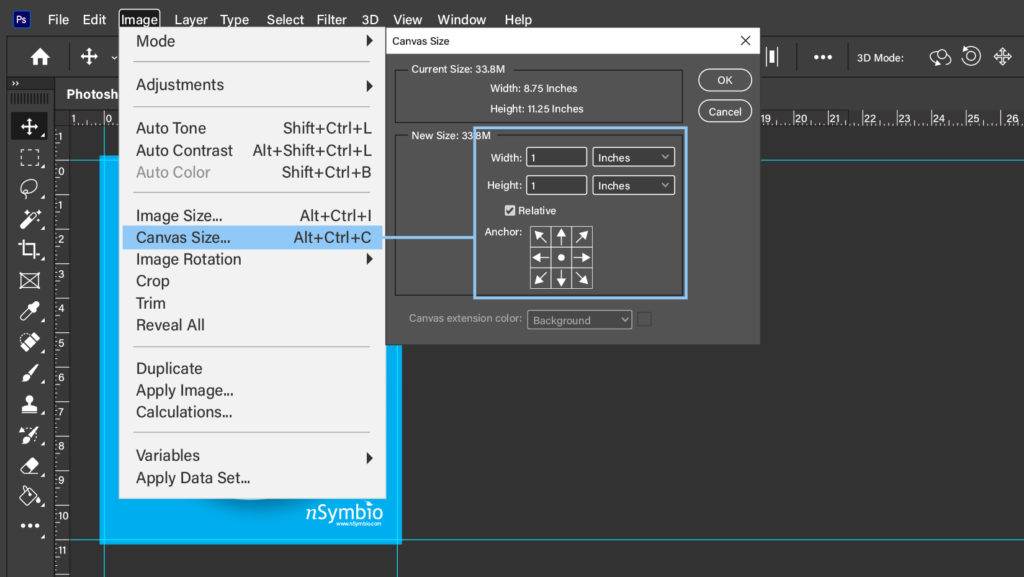
Now we’ll need to update the canvas size to include the bleed. In this case, I will add an 1/8 of an inch (0.125”) to each side (top, bottom, left, and right). I’ll add 0.125” (top) + 0.125” (bottom) + 11” = 11.25” (height) and 0.125” (left) + 0.125” (right) + 8.5” = 8.75” (width) or a finished size of 8.75” x 11.25”. To update the canvas size, go to Image > Canvas Size and simply update the dimensions to 8.75” x 11.25” and click “OK”.
Note: Make sure that the anchor at the bottom of the dialog box is set to the center to force the document to add from the middle out so your guides will maintain their finished size.
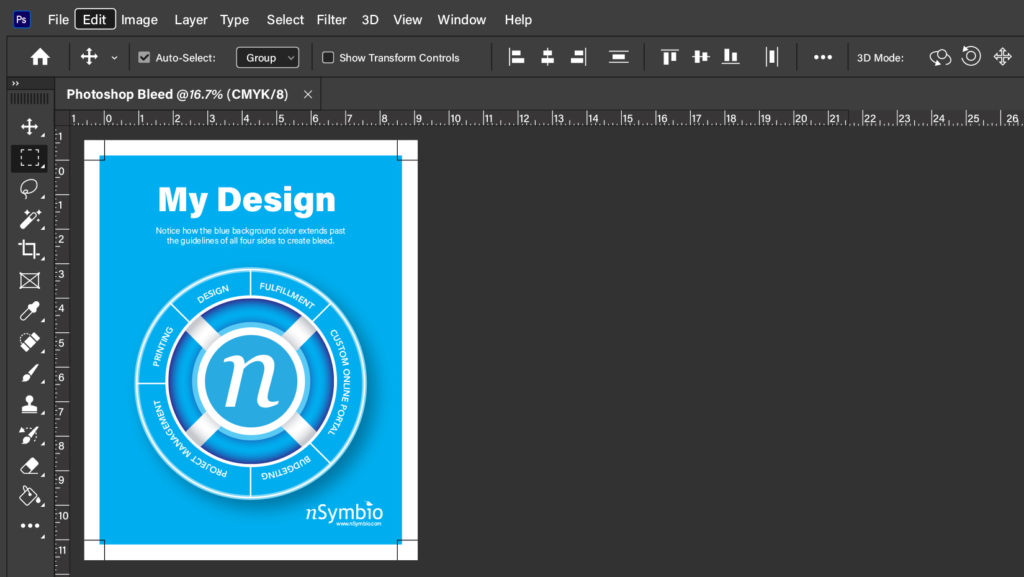
You should now have a document that is set to the bleed size of your final project and guides that indicate where the document will trim.
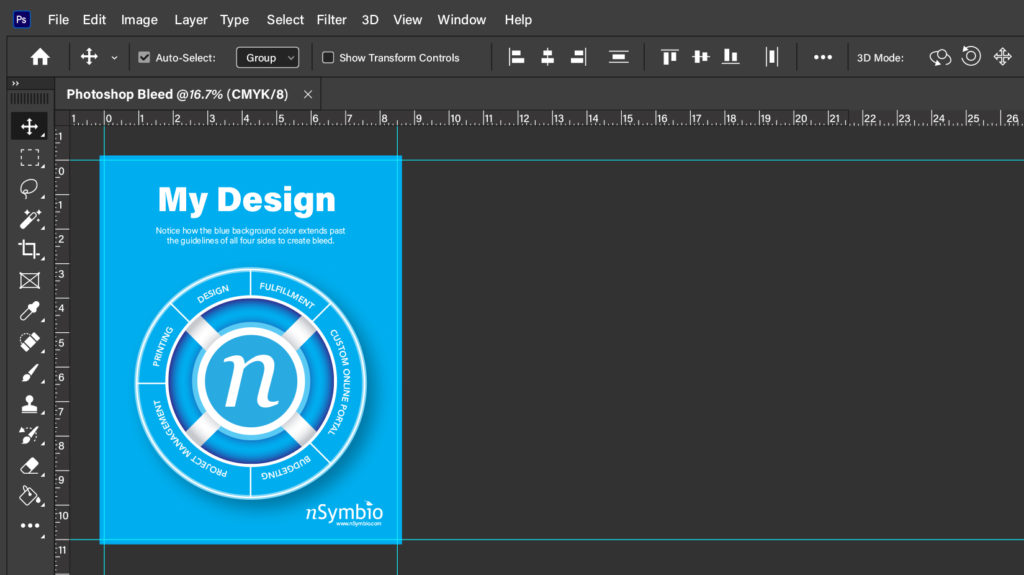
Create your Design
Now that you have the foundation for your crops /bleed, simply build the document knowing that the final printed piece will be trimmed on the guides. Anything that bleeds will need to extend past the guides.
Adding Crop (Trim) Marks in Photoshop
As long as the file contains bleed, that’s pretty much everything we need in order to complete your project. However, for clarity it’s always a good idea to include crop marks so that we know exactly where you expect us to trim.
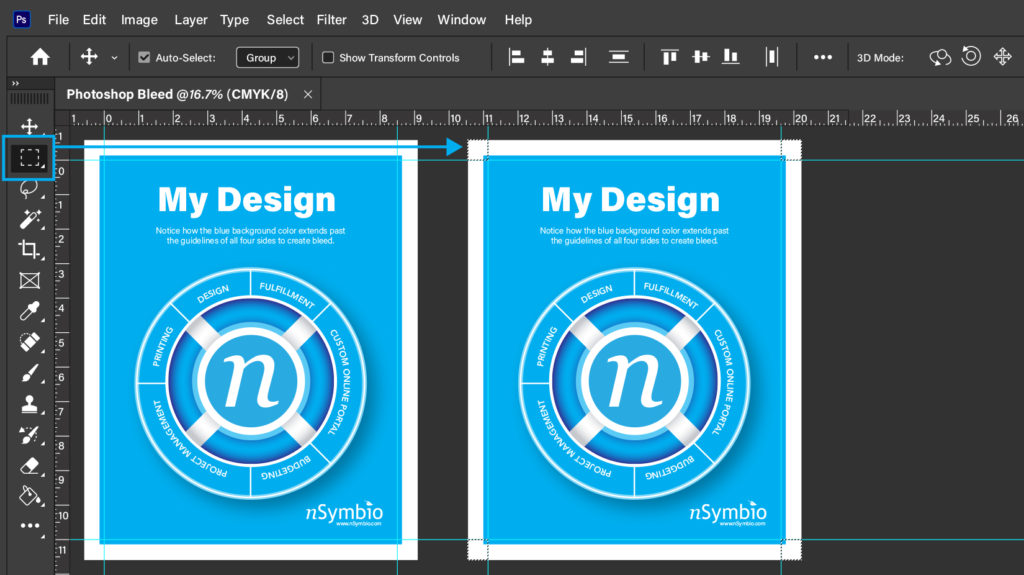
To create crop marks within Photoshop Choose Image > Canvas Size and enable the “Relative” button. Enter 1” in the Width and 1” in the Height dimensions and click “OK”.
Now create a new layer for your crop marks and create a selection in each corner area of the image using the Rectangular Marquee tool. You can do all four corners by first selecting the upper left corner, then while holding “Shift” select the remaining corners until all four corners have been selected (as seen below).
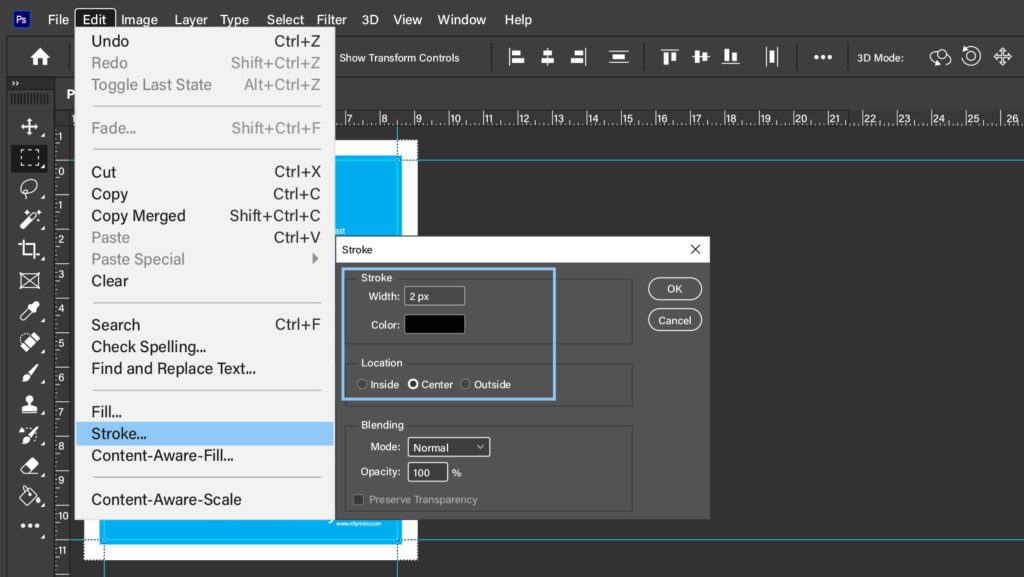
Now that all four corner selections are active, choose Edit > Stroke and enter a 2px stroke to the width, make sure the color is set to black, set the Location to “Center”, and click “OK”.
Congratulations, you have just created a print ready Photoshop file complete with crop marks and bleed.
